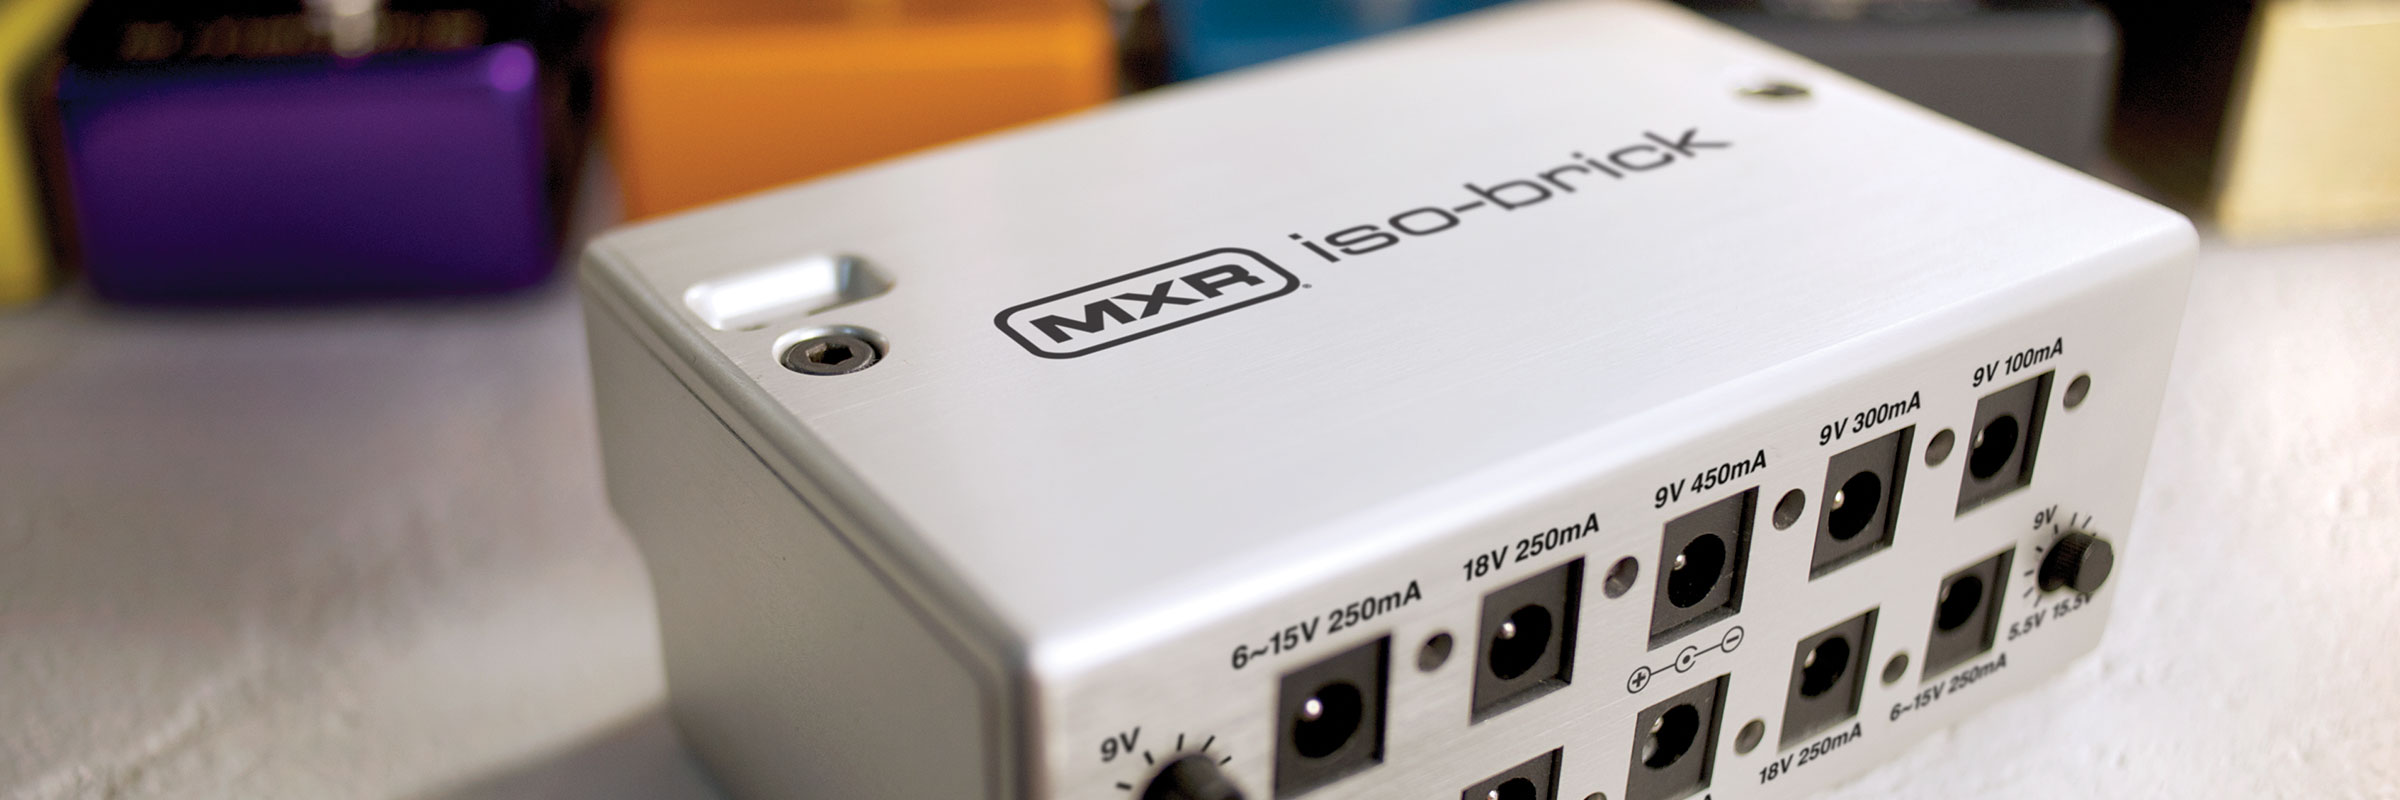
The M238 MXR® Iso-Brick Power Supply is designed for the demands of the stage and the rigors of the road. With ten fully isolated outputs and a lightweight, pedalboard-friendly housing that’s built like a tank, this potent piece of hardware will keep your pedals running with quiet, consistent power gig after gig.

Why does having isolated outputs make a difference? We asked the MXR design team to explain that and more, including several questions on how to get the most out of this wonderful power box. Get inside the Iso-Brick Power Supply below.

What are the advantages of fully isolated outputs?

When power outputs are fully isolated, there is no common electrical connection between them. This provides ground isolation between power sources, eliminating noisy ground loops and making high gain signal chains quieter. It also prevents one pedal from corrupting the power supply of the other pedals if something goes haywire.

Basically, having isolated outputs is like powering all of your pedals with high quality batteries.
Is there anything else in the M238’s design that helps to reduce noise?

Yes—aside from isolating the outputs from each other, we’ve ensured that each fixed voltage output receives a stable, low-noise voltage source by using linear regulators. The variable outputs are regulated by a hybrid design consisting of an adjustable buck regulator and two LC filters—which block switching noise—to simulate the smooth output of an adjustable linear regulator. This was done to minimize heat and power loss in the circuitry while preserving the output characteristics of an adjustable linear power source.

How do fully isolated outputs provide more protection to pedals than non-isolated outputs?

If pedals are powered from just one source—that is, if they aren’t isolated—they can potentially suffer damage if one of the effects experiences an overload or other voltage problem. With an isolated output, that potential damage source is kept from the rest of your pedals.

Is there anything in the design to prevent overheating?

We built in thermal protection for each output, so the M238 will automatically turn itself off if it reaches unsafe operating temperatures. The outputs are also protected against short circuiting via foldback current limiting.
Which types of pedals can be used with the Iso-Brick Power Supply?

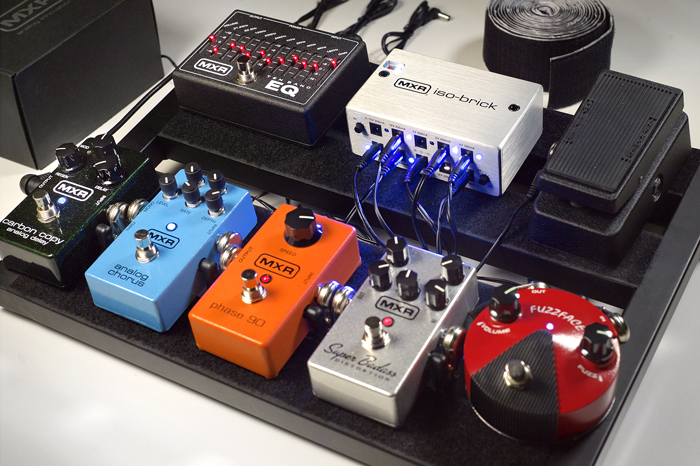
You can use almost any pedal—digital or analog, positive or negative barrel—as long as it takes DC power and meets the voltage and current requirements of the M238’s outputs.

How can players make sure they’re matching pedals and outputs correctly?

It all depends on the voltage and current requirements of your pedals, and you need to know both before you ever connect a pedal to a power source. Digital pedals require more current—measured in milliamps (mA)—than analog pedals, so keep that in mind when allocating your outputs between the two types.

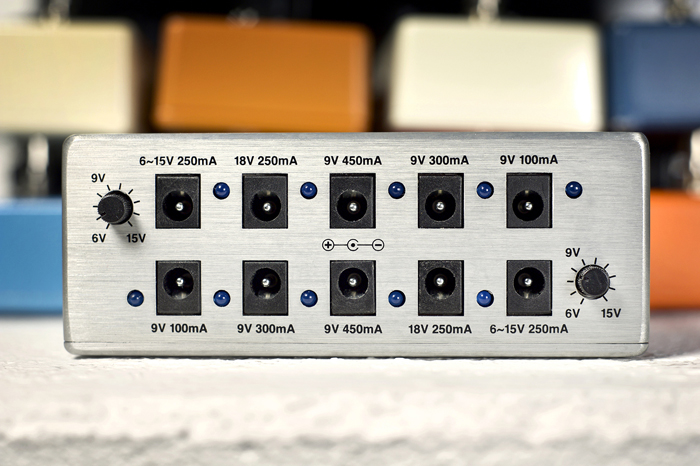
The M238 has six 9V outputs: two at 100mA, two at 300mA, and two at 450mA. The 100mA outputs have more than enough current—by far—for pretty much any 9V analog pedal, but many 9V digital pedals require more current. In that case, the 300mA and 450mA outputs will be more than enough for most digital pedals. If you’re only using analog pedals, it doesn’t really matter which output you use as long as the voltage matches.

The two 18V outputs and the two variable 6V–15V outputs adjustable are rated at 250mA, which is still enough juice for most digital pedals. The vast majority of digital pedals are designed to run on 9V power, however, so you’re likely to use the 18V outputs for analog pedals. If you have odd voltage requirements—up to 15V—or you want to “sag” a 9V analog pedal, then use the variable outputs.
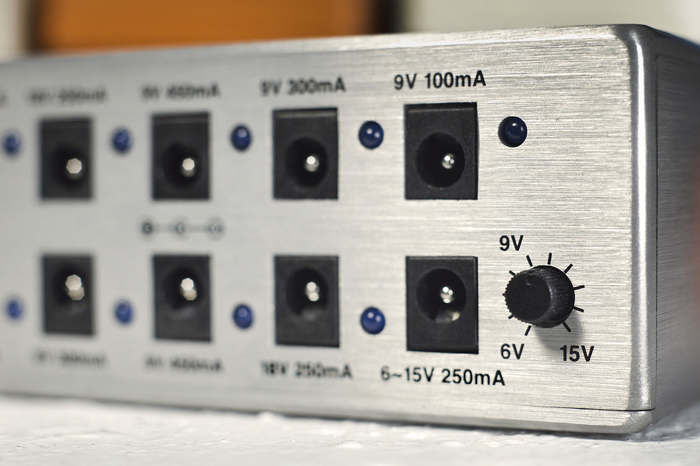
How can I make sure the variable outputs are set to the right voltage?

The easiest way is to measure at the end of a connector cable with a multimeter. First, make sure the power supply itself is plugged in, and then plug one of the connector cables into one of the variable outputs. Set your multimeter to measure DCV; if yours doesn’t automatically detect voltage, select the 20 DCV setting. Set the voltage control about where you want it.

Next, use one of your multimeter’s probes to touch the inside center of the plug’s barrel, and use the other probe to touch the outside of the barrel. Your multimeter will then display the output’s voltage. Use the variable control to adjust as needed. Note: whether the number shown on the multimeter’s screen is positive or negative depends on which probe touched which part of the barrel, but that doesn’t matter for our purposes. The value will be accurate either way.
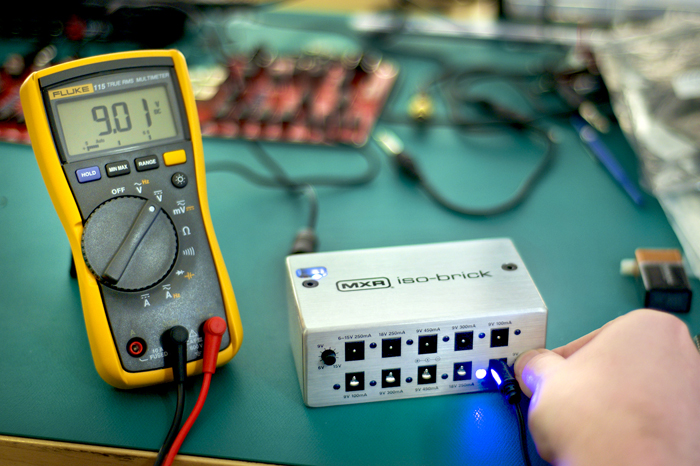
What is voltage “sag”? Which pedals can be “sagged” below 9 volts, safely and with good results?

“Sag” refers to the effect of a dying 9V battery. As batteries get used up, their voltage level goes down, and this changes the sound of certain 9V analog pedals. This effect is called voltage sag, and a lot of guitar players back in the day loved it so much that they would purposely use dying batteries to get it.

The variable outputs allow you to achieve the same effect without the hassle of managing a constant supply of under-powered batteries. Overdrives, distortions, fuzzes, and wahs tend to benefit the most from voltage sag, but you won’t hurt your pedal by under-powering. Feel free to experiment.

Can the M238’s outputs be combined?

Any output may be combined with any other when stacked in series. When combining outputs in parallel, however, you need to make sure that the outputs match each other in voltage.

Are there any features to help players troubleshoot problems?

Yes—the M238 has LEDs to indicate a good or bad connection on both the input and each of the outputs, which allows you to quickly identify the source of a problem.

What precautions should players take when using any type of power supply?

First and foremost, make sure the voltage and current specs of your pedals are compatible with the voltage and current specs of your power supply’s outputs. Ignore this information at the peril of both your pedals and your power supply.

As a general rule, don’t give your pedal too much voltage—for example, by plugging a 9V pedal into an 18V output—and don’t force an output to give up more current than it can handle—for example, by plugging a pedal that draws 250mA into an output that only has 100mA on tap.

Chorus is an effect you should always have in your tool box, whether you’re slamming out riffs, firing off precision-guided arpeggios, or weaving ambient sonic tapestries. You can use chorus to fatten up your sound at lower settings, add depth and fluidity at moderate settings, and go full on space age at extreme settings.

How does it work? Chorus pedals double your signal and then delay the duplicate at a constantly varying rate—usually with an LFO, or low-frequency oscillator—before mixing it back into the original signal. Varying the duplicate signal’s delay time causes pitch shifting thanks to the Doppler effect. This pitch shifting mimics the slightly off-key sound created by a choir of singers—even though they’re singing the same piece of music at the same time, no one person is singing with exactly the same pitch and intonation as any of the others. And that’s why we call it chorus.

Guitar players first got their hands on the chorus effect in 1975 as a feature of Roland’s Jazz Chorus Amp. Pedal versions followed shortly after, but it wasn’t until the ’80s that chorus really found its place in popular music. Since then, artists from all over the stylistic map have embraced the effect, from Alex Lifeson and Andy Summers to Eddie Van Halen and Slash.

The MXR Line

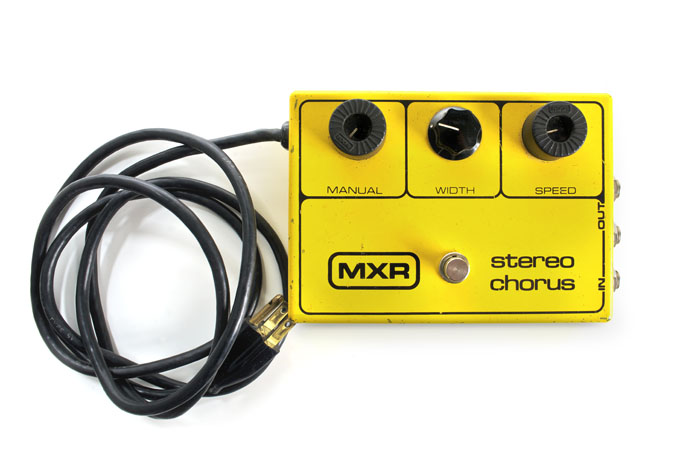
MXR® first entered the chorus market in 1980 with big, yellow, three-knob box simply called the Stereo Chorus. The original Stereo Chorus was all-around great sounding pedal, but its most defining feature was its Manual control. As with the MXR Flanger, the Stereo Chorus’ Manual control allowed players to adjust the effect’s delay time (the Speed control adjusted the oscillation rate).

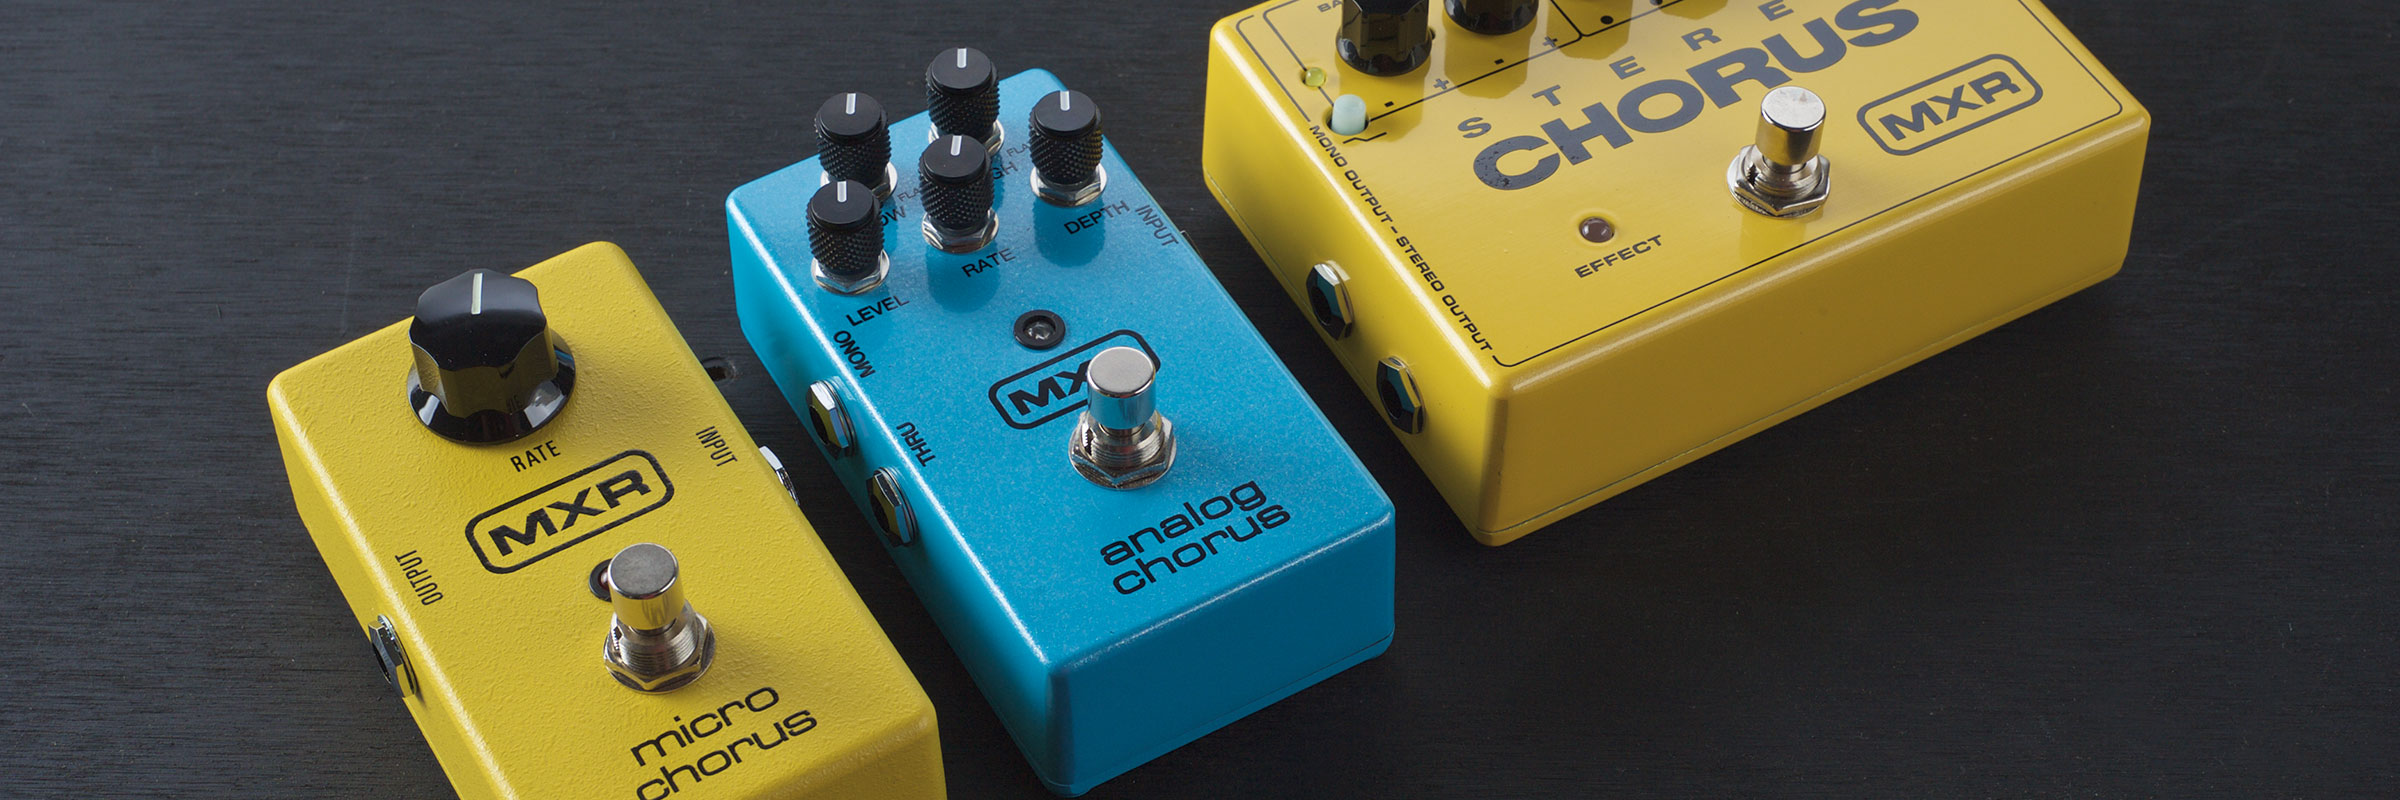
The Micro Chorus followed the Stereo Chorus in 1981. With a single Speed knob for straightforward operation, this pedal is to chorus what the Phase 90 is to phasing. While compact and easy to use, the Micro Chorus pours out volumes of rich, modulated shimmer with a hint of flange around the edges. A few years back, we re-introduced the Micro Chorus—along with the Micro Flanger—as a faithful reissue of the original circuit.

The Stereo Chorus returned to the MXR line several years ago with a complete circuit overhaul. Today’s version has a very clean, modern sound with a very pronounced pitch shifting quality. Running on 18 volts, the Stereo Chorus now has a ton of headroom. The MXR team swapped out the Manual control for an Intensity control—essentially a wet/dry mix—and added Bass and Treble EQ controls and a Bass Filter switch to remove the effect from low end frequencies.

The Analog Chorus is MXR’s take on the classic “dirty” analog chorus sound. Compared to the Stereo Chorus, its pitch shifting quality is more subtle, but with lower headroom, this pedal breaks up nicely when pushed with a little extra gain. Like the Stereo Chorus, the Analog Chorus has controls to tweak the wet/dry mix and shape the high and low end of the chorus effect. The Analog Chorus is a natural fit for hard rock and metal—just ask Slash and Rise Against’s Zach Blair—but its tweakability makes it an incredibly versatile pedal.

Using the Chorus Effect

How you use a chorus pedal depends on your needs as a guitar player or bass player. Here’s a few tips to get the most out of the effect without overdoing it.

First, have an idea of why you want to add chorus to a song. Adding ambience and movement to a slow piece, making your solo stand out, thickening up strummed passages—these are all good reasons to use a chorus pedal.

When you decide how you want to use your chorus pedal in a song, experiment with different playing styles and control settings. You’ll have to play differently with a subtle tone thickening sound dialed in than you would with a spectral, ambient sound or with an all-out deluge of swirling oscillation.

Finally, try combining chorus with other effects. Experiment. Overdrives, distortions, and delays are a great place to start. If you want to take your modulation game to the next level, try adding a flanger or a phaser to the mix. As for the order of effects, there’s obviously no hard and fast rules, but most guitar players willx tell you to place your chorus pedal after the effect you’re pairing it with. This allows the chorus effect to fully develop and work its magic on the rest of the signal.

Don’t let its small size fool you—the Cry Baby® Mini Wah’s tones are just as powerful and expressive as those of its larger compadres. It’s built like a tank, and at half the size of a standard Cry Baby pedal, the CBM95 is perfect wherever space comes at a premium. Whether you’re trying to make room on a full-sized pedalboard or add authentic Cry Baby tone to your micro travel board, this pedal is a must-have.

Senior Engineer and Cry Baby design veteran Sam McRae sat down to give us a run down of the Cry Baby Mini Wah’s sound, feel, and construction. Read on.

How does the sound and frequency range of the CBM95 compare to the GCB95? Does it use a Fasel® Inductor?

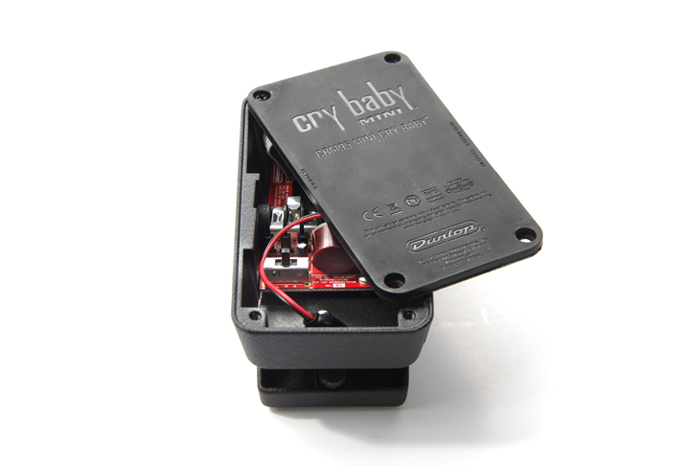
Sam McRae: The Cry Baby Mini Wah is indeed equipped with a classic red Fasel inductor, but it has three different frequency ranges, which you can select by removing the bottom plate and using the internal 3-position switch.

The High setting (H) gives you the same sound as the GCB95. The Mid setting (M) gives you more of a classic or vintage sounding range, and the Low setting (L) gives you a darker sound. Basically, we took our three most popular Cry Baby voicings and put them into a housing that’s half the size. That way, you can get pretty close to the voice of your favorite standard-sized Cry Baby Wah and save pedalboard space at the same time.

Does the CBM95 have the same physical sweep range as a standard-sized Cry Baby Wah?

Sam: Yes, the physical sweep range of this pedal is the same as our standard-sized Cry Baby Wahs. What that means is the rocker can travel just as far in either direction, so you have just as much control over the behavior of the effect.

Is there anything mechanically different about the CBM95?

Sam: The potentiometer is a totally custom design that preserves the historical taper of the original pedal but while being scaled down to fit the smaller space. We employed the latest technology to give it exceptionally long life (greater than 3 million cycles), minimize noise, and retain the iconic Cry Baby sound. We also sealed it to keep out dust and any other particulates that might interfere with the wiper and the resistive element. We further reinforced the longevity of this pedal by designing the rack and pinion gears so as to provide a constant relationship between the rocker rotation and the rotation of the potentiometers shaft without any variation in the interface pressure.

We designed the CBM95 for serious, rigorous performance—it’s not just a cute little afterthought.

Who is the Cry Baby Mini Wah designed for?

Sam: If you already use a Cry Baby Wah as part of your sound but you want to free some space on your board, or you’ve wanted to try a Cry Baby Wah but you were reluctant to do so because of the footprint, then this pedal is definitely for you.

And even if space isn’t an issue on your board, this pedal sounds great in its own right. The three voicings make it very versatile.

When guitar-driven rock ’n’ roll took over the music scene in the mid–1960s, the era’s trailblazers were equipped with Herco’s original nylon pick. By the end of the decade, nearly every guitar player was using them. Their smooth feel and warm sound appealed to the pros who were recording hit records and playing on the world’s biggest stages, while their widespread availability made it an easy choice for anyone wanting to learn to play rock guitar.

The list of greats who have used Herco picks over the years is extensive, and it includes Jimmy Page, Joe Walsh, Scott Gorham and Brian Robertson of Thin Lizzy, Pete Townsend, David Gilmour, Don Felder, Tommy Bolin, Rory Gallagher, and Gary Moore. The popularity of those picks endures today, with some artists—such as Keith Urban, Steve Jones, Gene Simmons, Billy Duffy, Troy Van Leeuwen, Don Felder, Eddie Van Halen, Wilco, Queens of the Stone Age, Nikki Sixx, and Madonna–having their own custom molds.

A post shared by Jim Dunlop (@jimdunlopusa) on

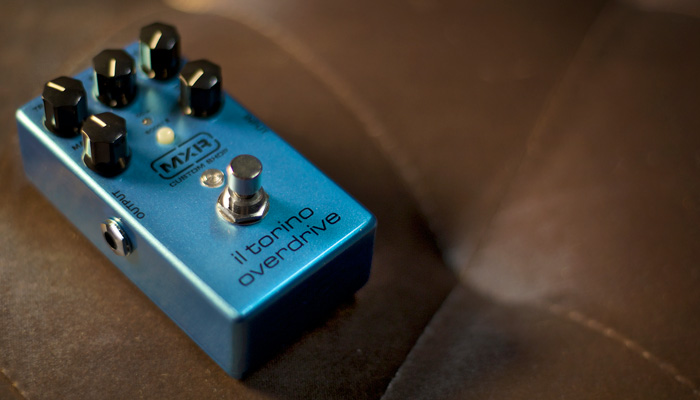
The MXR® Custom Shop is all about sonic discovery. In their effort to explore the furthest reaches of tone, the Custom Shop team invites accomplished independent pedal designers from around the world to contribute their unique perspectives and design styles to the cause. The first such collaboration is the Il Torino Overdrive, a highly tweakable overdrive pedal designed with Carlo Sorasio, Italy’s top tone maestro. He works with Italy’s top musical acts, designing amps and pedals to suit their needs on the road and in the studio.